Friday, July 27, 2012

Old Newspaper Dates Gas Light Retrofit

The Crickets performed "That'll Be the Day" and "Peggy Sue" and Sam Cooke sings "You Send Me" and "For Sentimental Reasons." The Ed Sullivan Show on December 1.

Newspaper: a renovator's best friend...The newspaper was wedged in to plug the plaster hole during the wall repair post-retrofit. 


Anyone remember Gimbels Department Stores?

So the house presumably had gas light up until just before 1958. 

This is the electrical wiring which was commonly installed onto the existing gas light fixture plate (here from the ceiling), and the wiring run along the same wall chases as the gas pipes. Made sense.  But totally not-to-code today. 

First Floor Bathroom Interior Brick--Evaluation

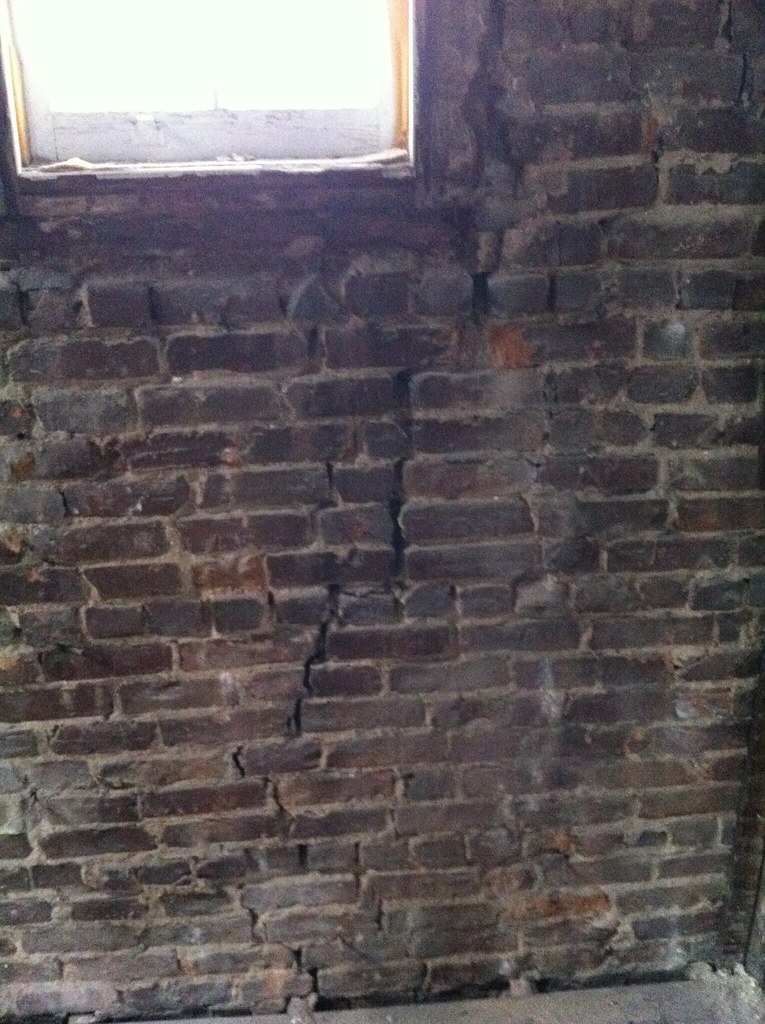
DiMola and crew demoed the bathroom this week.  I had a good look at it last night.  Like all the other interior walls in the house, this one will require repair as well.  There was some sort of settling happening on this side of the house, in the bathroom area, which is basically the back-center of the structure.  There was a very similar shift-crack in the wall to the right of the window as was seen on the second floor.  But curiously, you do not see the same pattern of stress cracking in the basement in this area.

Second floor stress cracking.

First floor stress cracking

Close-up first floor.
You can see evidence of some mortar patch repair done at some point in the bathroom's history.  What I am hoping we can do is tuck-point and replace the bad bricks w/o having to have a lintel placed in to secure the brick arch.

Note the attempt to shim the floor joist also at some point in the bathroom's history.  In the next post, I speculate on the date of the renovations. 
Before demo image:  I don't believe we want to replace the window at this point--it functions well.  It is the oldest window in the house, a single pane, double-hung wood window with the sash weights.  Maybe it is a remove, re-glue the joints, and reinstall job.  Not particularly difficult, but a little time consuming.

Wednesday, July 25, 2012

Demolition on first floor bathroom to take place today

We've been concentrating on moving all upstairs over the past several weeks.   We still have several minor touch-ups with the painting, including finishing the front of the peninsula. However, we must now focus on the first floor, as we want to rent it asap!

We are bringing back Nick DiMola for the demolition.  As we have mentioned before, his company DiMola Bros.did the initial demo of the second floor.  Below are the before pictures.  We'll post the after pictures tonight.

The toilet was not bolted down, instead, what appears to be drywall compound was pressed into the cam, and then the cap was inserted over the bolt...

Some sort of wallboard was glued to the aging plaster...

The toilet was set upon drywall compound, and as you can see, the wax gasket is completely worn away.  And why someone put in a rubber gasket is unknown--busted flange maybe?  We did not investigate further.


Sink removed.

Bad ceiling tile.

As we started to pull the ceiling and wall-board, we realized there was more demo than we wanted to handle.

Monday, June 25, 2012

Kitchen nearly finished--added handles this weekend

Again, many thanks to Nelson for his assistance! 

We used a cabinet hardware "jig" made by Woodhaven Tools to get the hardware positioned properly.

We're pretty pleased with look of the handles against the KraftMaid slab maple cabinets.  The handles were sourced from Tile World out in Flushing. 

Level!

Just thought it was cool how the hood lights glow at night...

Thursday, June 21, 2012

Security Cameras Added

I have not talked about the need for security cameras yet--I always intended to put them in, but it took the theft of my scooter to spurr me on to complete the job.

I purchased two Ethernet wired cameras, both for outdoor use by Panasonic (BL-C140A and BL-C160A), and one wireless one with pan-tilt-zoom for indoor use by TRENDnet.

Ultimately, I could not get these to work satisfactorily with the computer--despite several attempts.   First, The PoE (power over ethernet) cameras by Panasonic were good in theory, as you do not need to run a seperate power cable, just the Ethernet.  However, the power injector could not compensate for the 40' run back to the switch for some reason.  even at 25' it was a non-starter.

Second, I did not fiddle with the ports successfully to allow two cameras on the same internet web page.  I could get one or the other.  Maybe when we finish moving upstairs, I'll have more time to fiddle.  The picture quality ans refresh rate were pretty acceptable, however.  

The TRENDnet will be hooked up inside somewhere, maybe at the top of the stairs on the second floor.   I am kinda kicking myself that I did not think to have power wired up at the ceiling...

So, after "failing" with the first cameras, and the sense of urgency to get a system up and running, I went with a Swann DVR4-2600 DVR (4 Channel, 4 Cameras) from B&H here in the city.  Wired and powered, the cameras needed to be mounted and the connection protected from the elements.  So, off to Home Depot to gather the necessary supplies. 

AFC Cable Systems 1/2 in. x 25 ft. Non-Metallic Liquidtight Conduit (edit--actually 1/2" not 3/4")
Taymac 1-Gang 5-Hole Round Electrical Box
Outdoor covers for the Boxes
Conduit clamps
Masonry anchors
Right -angle connectors
Silicon--clear
Machine bolts and nuts


Now the assembly:


I drilled through the cover, and silicone-sealed the camera housing.  The cameras adjusted, but be really careful, as the screw locking the camera in place is flimsy.  I stripped one, and needed to replace it...

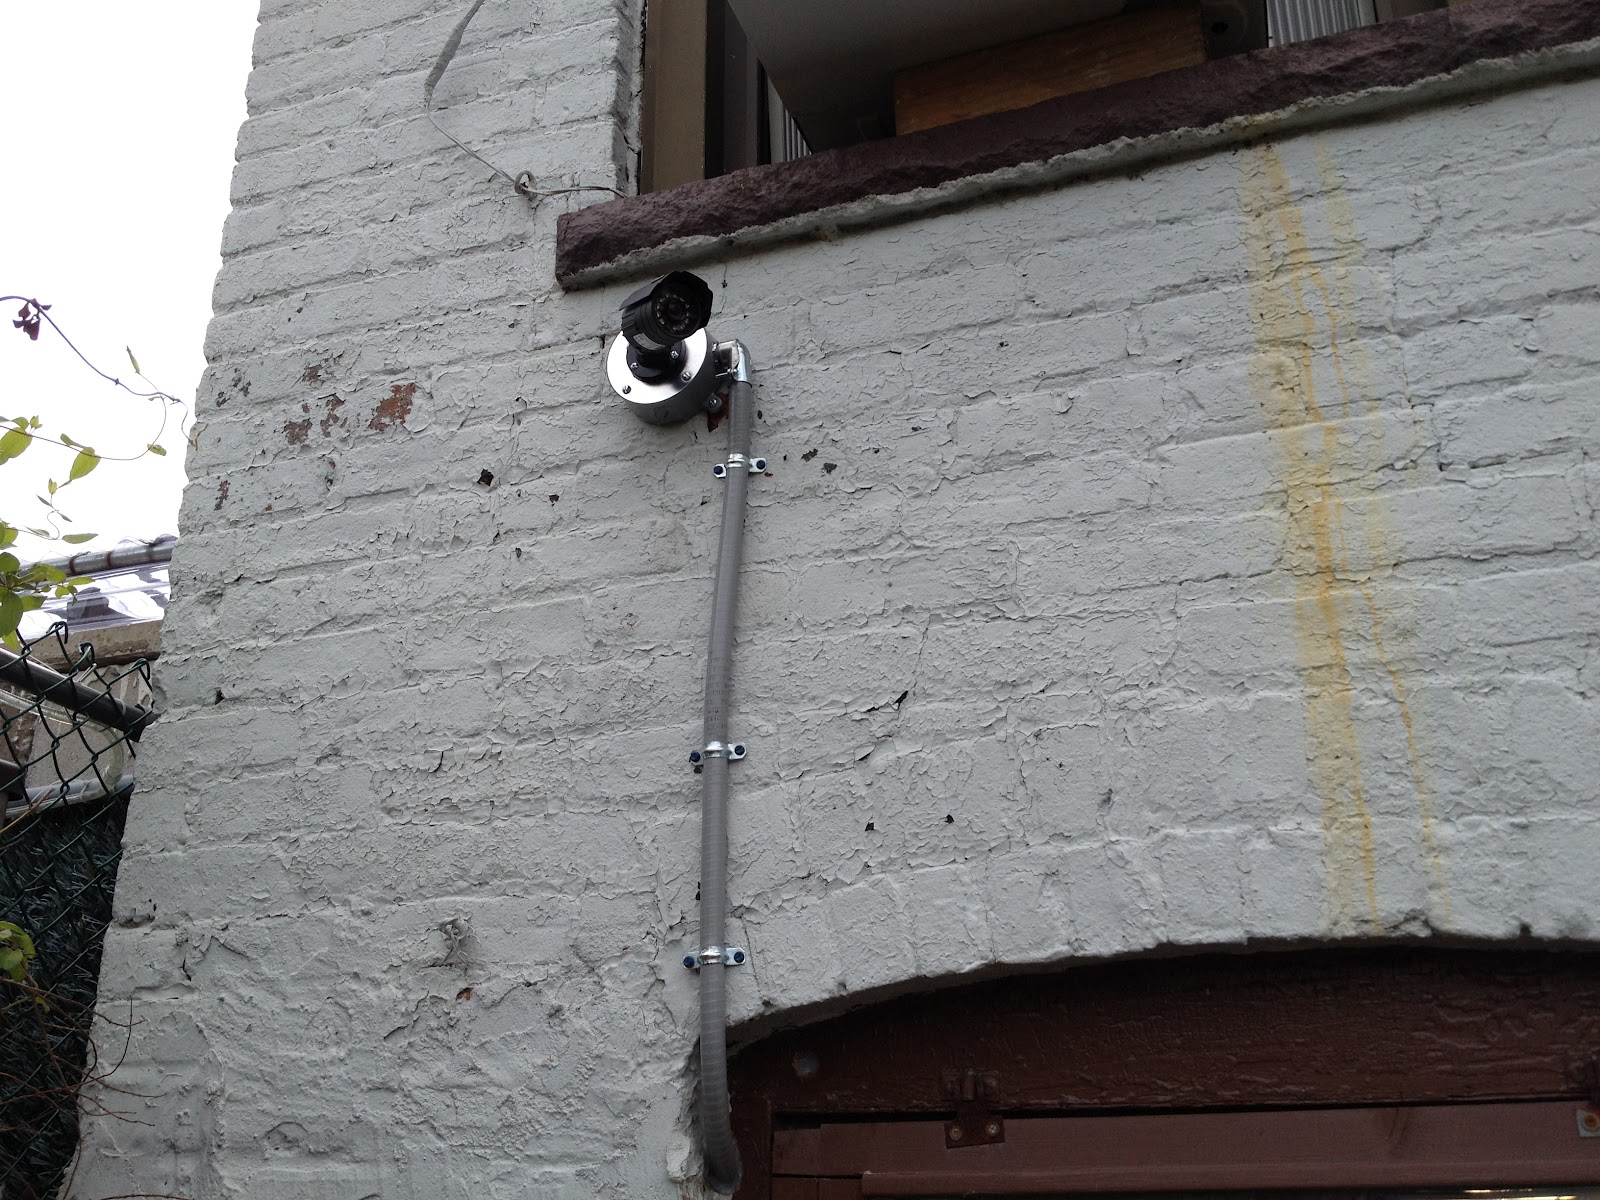
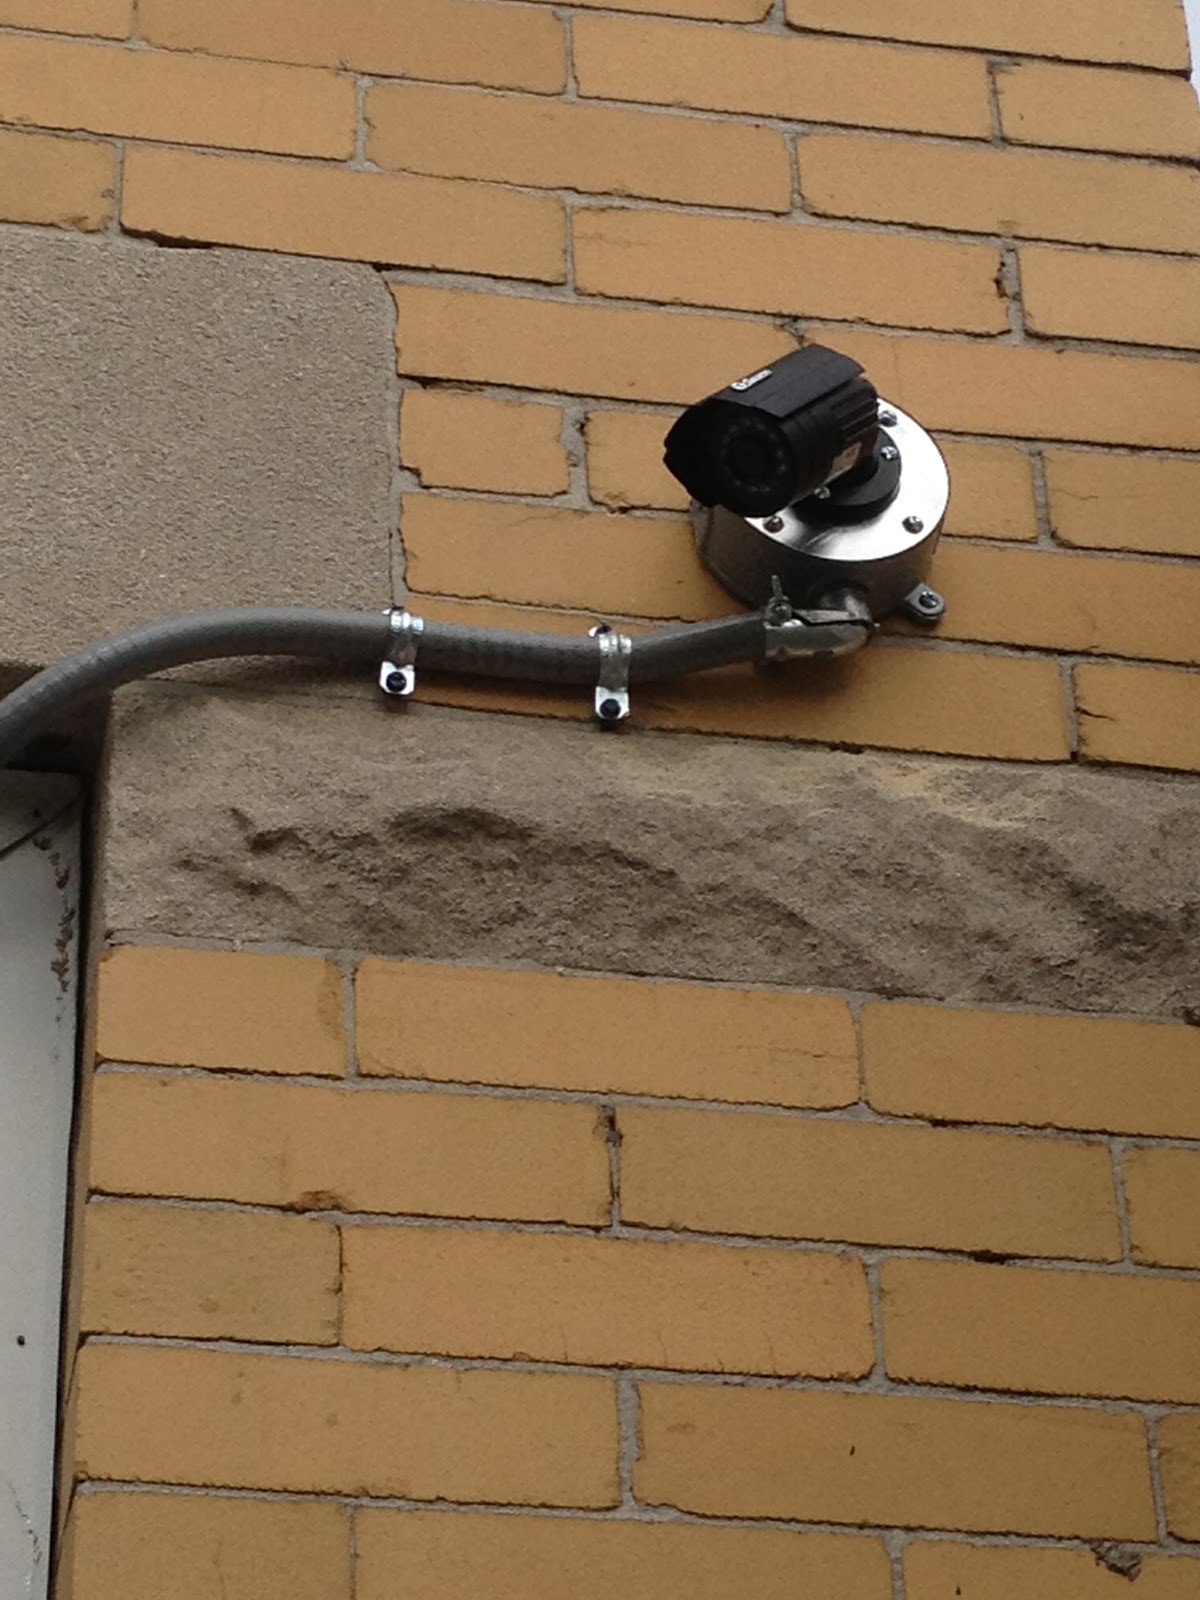
The camera cable has a power in and a BNC video out.  I plugged up the four holes i was not using with the included threaded plugs, and connected the right angle clamp to the side I wanted the conduit run to.

Fishing the cable through.  This took some practice, and there is little room in the conduit for the connectors.  I had to stagger them to get them through.  Note the right angle clamp.  Once all was fitted, and the wires ran to the box, i applied a liberal amount of silicon to the end of the conduit and to the inside of the clamp, effectively sealing it watertight.

Finished in the back.  The camera points at the basement walk-out door.

Front camera #1.  Looks at the fenced in area.

I added a second camera in the front just looking down at the steps--the shot lower left.  This is what the cameras look like in daylight.  The upper right square was filled with a camera in the basement looking from front to back, including the stairs leading down from the first floor.

Night vision.
So far, i have been able to see the cameras on the local LAN, but have not configured them for remote viewing.  These come with a iPhone app, and i have not gotten that to work yet either. I will report back once i do.  But for the meantime, they are a visible deterrent and a recorded record of who is entering the house when.

Movin' on Up! (Finally)

Yesterday, my neighbor, Pete, came by to assist in getting the couch and chair up the steps.  Thanks Pete!  We will update as we go along.


Better images coming soon.  TV hooked right up--no issues with the cable run in the wall.

Looking at the "living room." 

Monday, June 11, 2012

still painting...

Polly cleaning the screens

Mostly finished.

Front room, finished.

View into Polly's closet.  Note the jack on the wall for the cable TV.

Anastasia has already moved upstairs--you can just see the foot of her cot in the middle room.
The painting is taking much longer than anticipated.  Our painter, Rob, is swamped with other jobs, so he's working on our job piece-meal around the other contractors.   But since it has been over a month since I posted anything, I thought some progress picture would be nice.

Tuesday, May 8, 2012

Newel--who knew!

Ever wonder what the parts of the stair railings were really called?  We needed to secure the railing to the brick wall in the hallway.  Previously, it had been attached to the plaster lath and the furring strips underneath.  So I figured I could place a post in there to close the gap.  When googling around for stair posts, I came up with the proper name, newel.  Who knew?

Newels or Newel Post- A solid rectangular, or circular section of vertical post at the center and at regular turns and junctions of a rail system. The newels provide the main support for the rail system. There is a starting newel at the base of the stairs and a landing newel at the turns or top of the stair.  Other newels are described as: center turned newel. Box newel . Pin top newel

5/8" holes drilled for anchors mated with 3/8" lag bolts

Bottom anchors.

Newel is true and plumb, but the balusters are not...

I may have over-engineered the installation.  ;]  On the top, I installed two "L" brackets attached with button-top screws and anchored to the wall with the lag bolts.
Here is how the door trim looks finished with the "crown"

This was a pain to cut the angles correctly--mostly due to my learning curve.  Once I read that you need to hold the crown molding upside-down in the saw, then I finally "got it."

Tangerine Tango, the 2012 color of the year, by Pantone.  Gives it an overall "Asian-inspired" feel, although that look was not our intention, but rather a nice coincidence.

Thursday, May 3, 2012

Hallway Floor, door trim, and bathroom lights

Just a small update--over the past several days, beginning on the weekend and finishing yesterday, we have been struggling with the hallway floor.  The idea was to strip it, as sanding the space did not seem to make sense, as we were never going to get it to a "natural" state again without a TON of work--which included a lot of dust...So here is a test-strip.

After stripping with Klean-Strip sprayable version, and a good couple of washings (when I say couple, I mean 4-5) with TSP, the floor looked like this.

The white stuff was the tile mastic/glue used to stick down the linoleum tiles.  


This is a shot of the floor when we purchased the house--the image is off of the Multiple Listing Service (MLS) from the original listing.  The "front door" was originally there.

After multiple washings, and a couple of 80# grit sanding belts, the floor is ready for paint.

Here in the boo-boo department is the threshold, which sits about 1.75" off the floor, where typically it should sit only a little over a half-inch.  I managed to re-use one of the old saddles to work it into the threshold "ramp." 

After one coat of latex satin exterior paint (Behr)

After three coats, waiting 24 hours between each application to let it dry.  Baseboard added, waiting on shoe molding.
I knew something does not look correct...

So I sent the pic to Polly.  I took the day off to hang out at the house with the electricians and to start on the door trim. Polly mentions that I have not cut back the wide pine piece to match the casement molding.

Much better.

Now the top piece aligns with the casement.  Crown molding is next, as we were looking to try and re-create some of the old look the house had when we bought it.

Not some of my best jig saw work...a little caulk and paint, and it will be good to go.

Finished top--waits for crown.
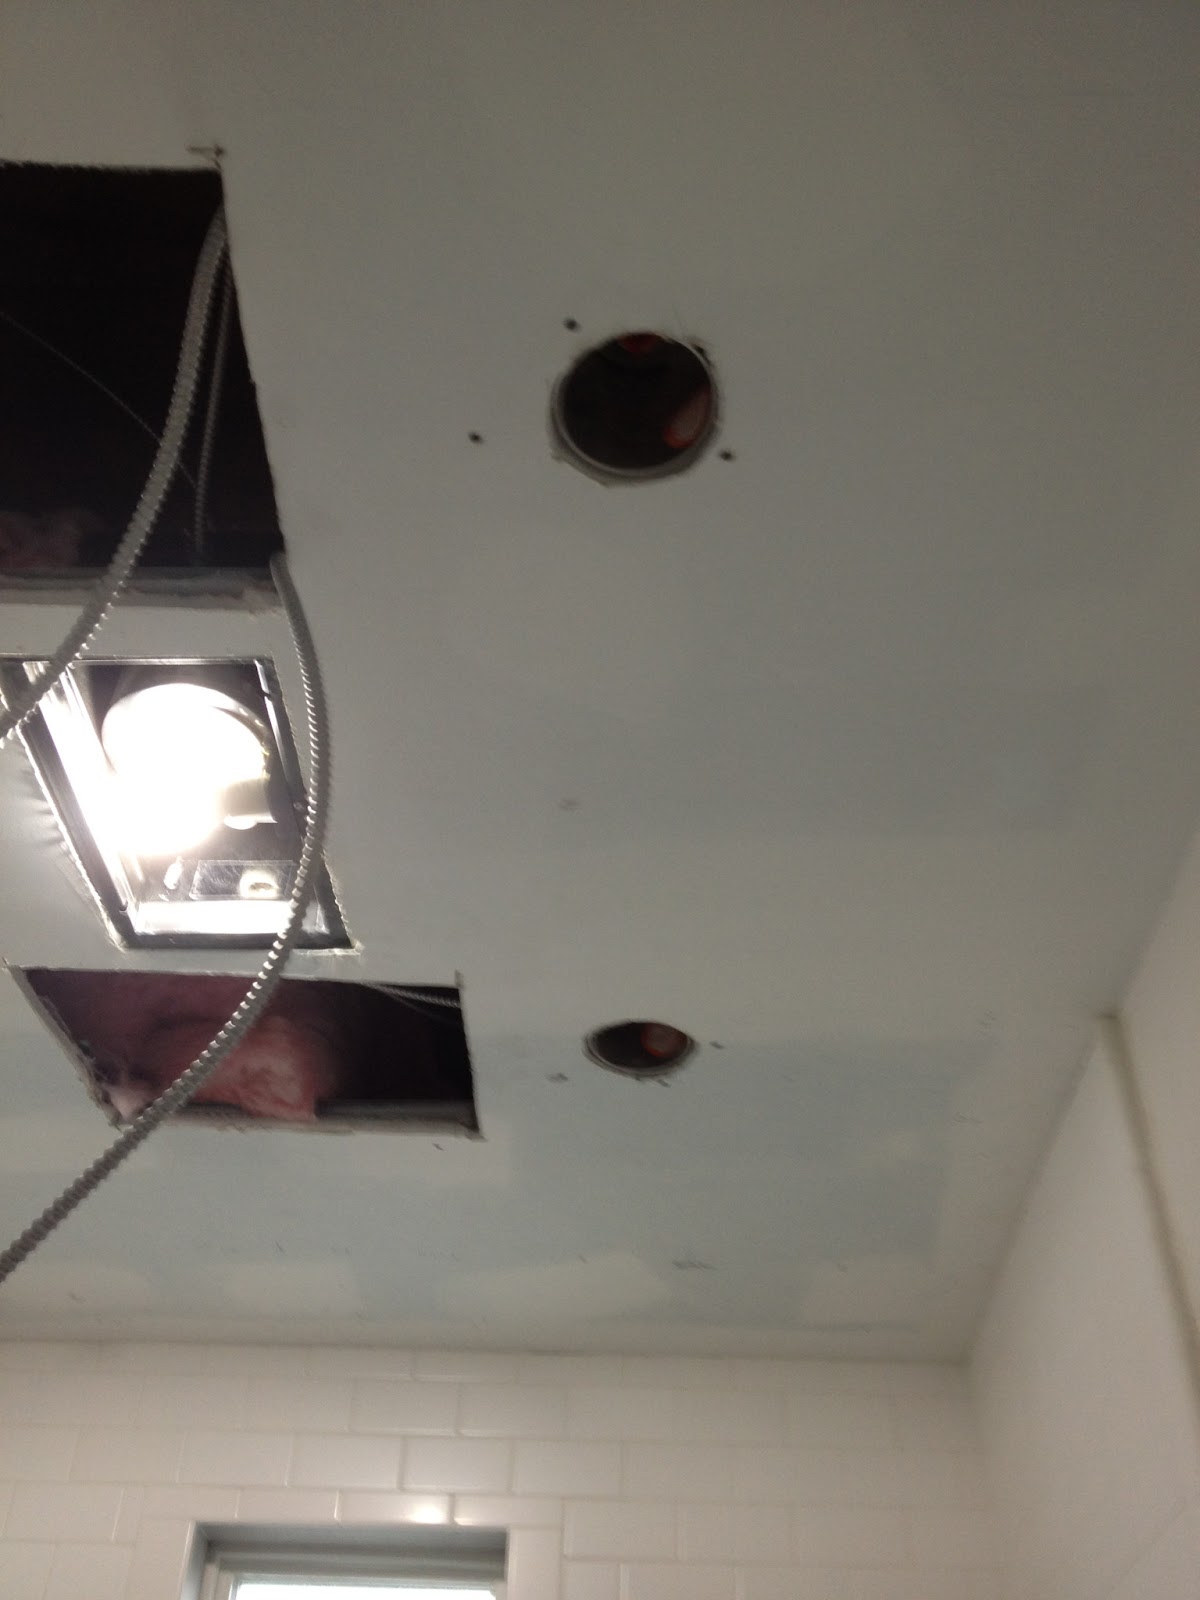
We had to have two additional ceiling pot lights installed in the bathroom--just not enough light.  Working out the placement was finicky, as the circle on the left would not work because the roof-vent was there; the electricians did not really want to place the lights in the shower--even though we purchased glass-covered baffles rated for damp locations...

Brings back memories...

Placement decided upon.  Finished pics coming soon!