
Here is the built-in closet project we undertook based on a hack we saw on the
ikeahackers website.
The middle room, now going to be Anastasia's bedroom, originally had a built-in closet, which was demoed with the rest of the walls.
 |
| The original built-in closet with trundle drawers. |
|
|
|
|
|
|
Polly wanted it put back in some fashion, so we first looked (and looked and looked) for a
pre-made stand-up closet solution to fit in the space. Unfortunately,
we do not have much depth to play with, and the pre-made
closets/wardrobes we looked at were either too deep or too shallow and generally poorly made, mostly using particle board or MDF with laminate. We also
needed to contend with the doorway, the closet light switch,
and the outlets which were needed to meet the electrical code. We looked at custom built-in solutions, but the cost of them was prohibitive. So, we wound up building it ourselves.
Below is a detailed explanation of the steps we took. I hope this is helpful to someone out there. Any questions, please feel free to email us.
 |
| We stared by building a shelf. We only had about 27" total depth to work with, minus the 3" or so we needed to leave clear for the outlets/switch. It measures 24" deep by 87.5"long. |
 |
| The electric was pulled through the frame, and light boxes were secured to the studs. |
 |
| A 1/2" sheet of plywood was secured to the top, bringing the total height to 93 1/2" Drywall on the underside is also 1/2". |
 |
| At 78 3/4" wide when closed, we knew we would have to place something along the sides to cover the gap. The pdf of the installation guide is here. |
 |
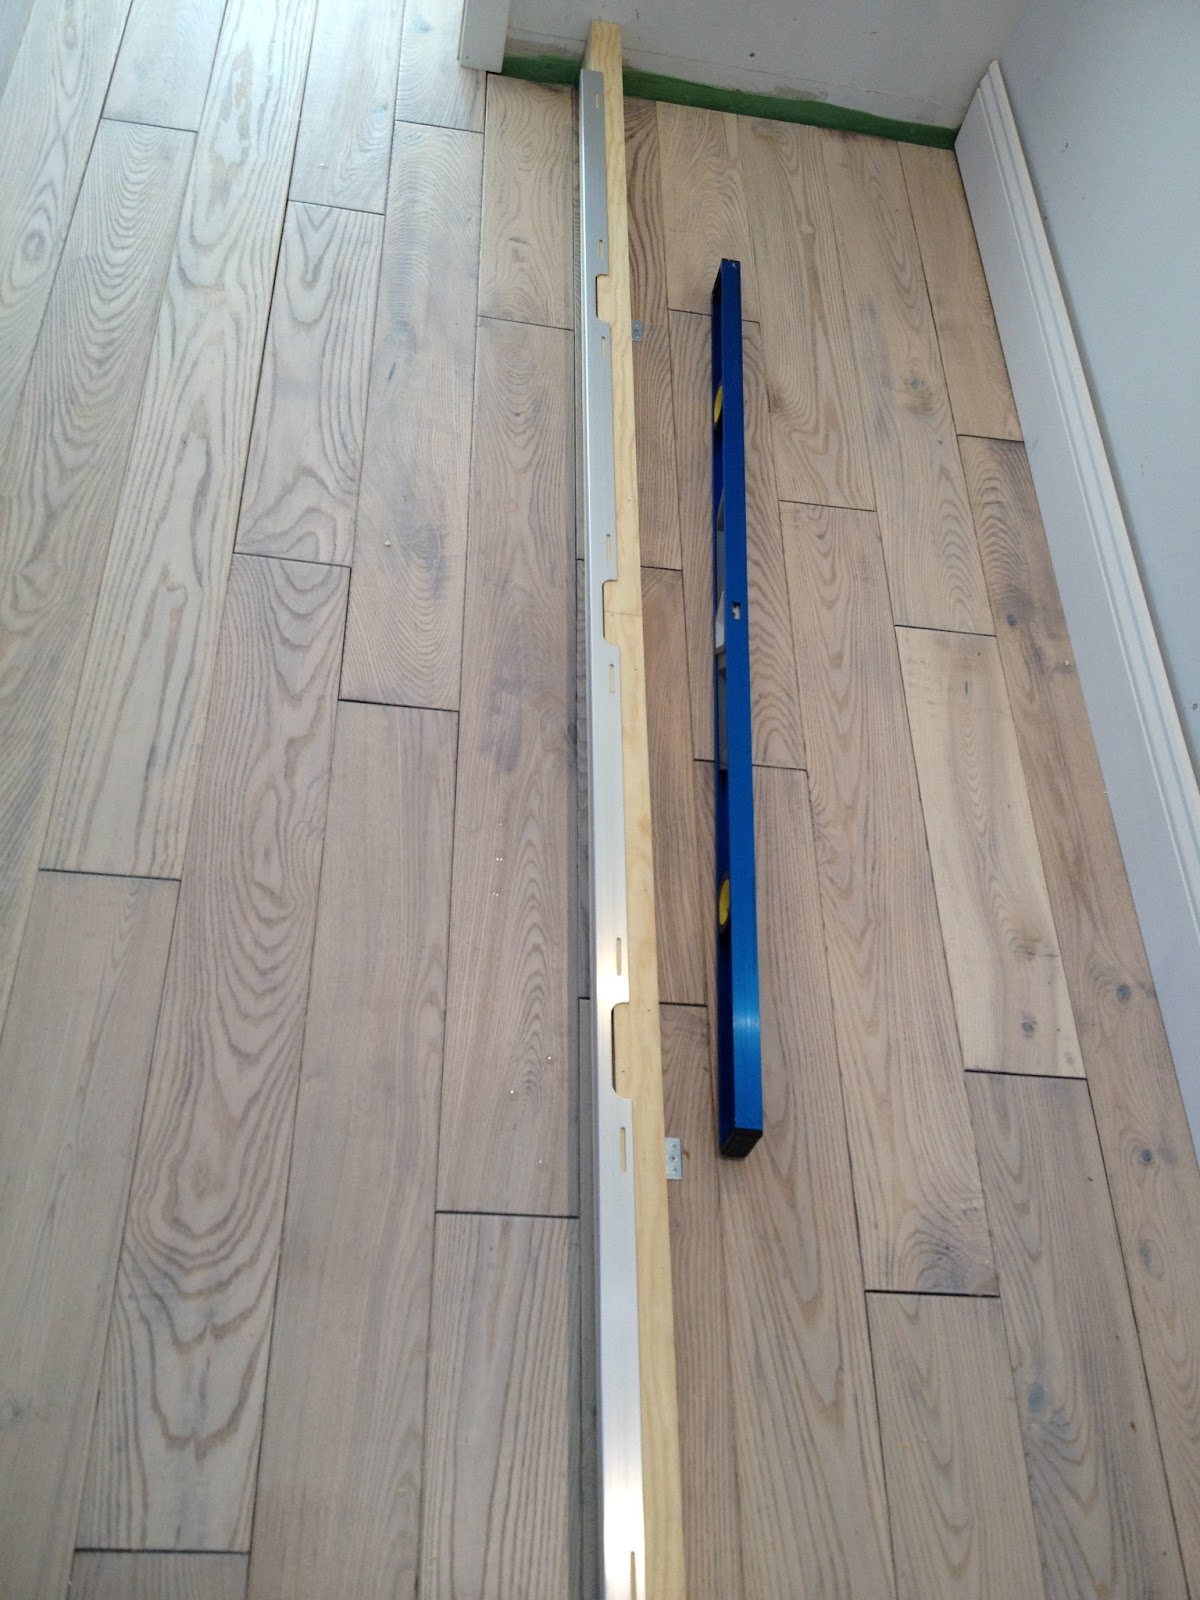
| We wanted the closet to have a finished look, and did not want to use drywall, so this is a piece of 1/4" clear pine lattice board, 5 1/4" ripped down to 4 1/2" and glued and nailed to the face. I am marking the center to begin installing the top track. |
 |
| Marking the center of the top track. |
 |
| There is a bolt and nut extending through the track securing the end-stops, which is preventing the track from sitting flush. |
 |
| No worries! --a 3/4" wood bit does the trick. Now the bolt/nut sits in recessed, and the track is flush. |
 |
| After tacking the track in with the two screws provided, I proceeded to drill four more holes for screws, figuring I would need the extra support--as Patrick too, noted in his hack write-up. (See above) |
 |
| I probably would have chosen button-head screws over drywall ones, but nothing was handy at the moment of install...I may change them, or not... |
 |
| Next came the curb on the floor. This was fashioned out of a super-straight 2X4, installed crown facing up. Again, wanting the closet to have as finished a look as possible, I ripped down another piece of clear pine lattice and glued/nailed it to the front face and top. |
 |
| We actually needed to add a second strip of lattice to the top to have the door sit in the bottom track. The total height of the curb is just about 3 3/4". I used corner braces to initially secure the curb to the floor for the dry-fit. Later, I installed four lag bolts to really make sure it was not going to move. |
 |
Holes drilled for lag bolts. And as you can see, there is not much clearance left for the outlet! |
 |
| The door sits about 2" up off the floor. The distance between the top of the top rail and the top of the bottom rail is 89 1/2" The curb is 3 3/4"--approximately. The hight of the shelf from tom to floor is 93 1/2" --approximately. Double check your measurements! |
 |
| Dry-fitting the door. It wound up a little sung on the right when closing, but this should free-up over time. Better this way, than too loose, me thinks. |
 |
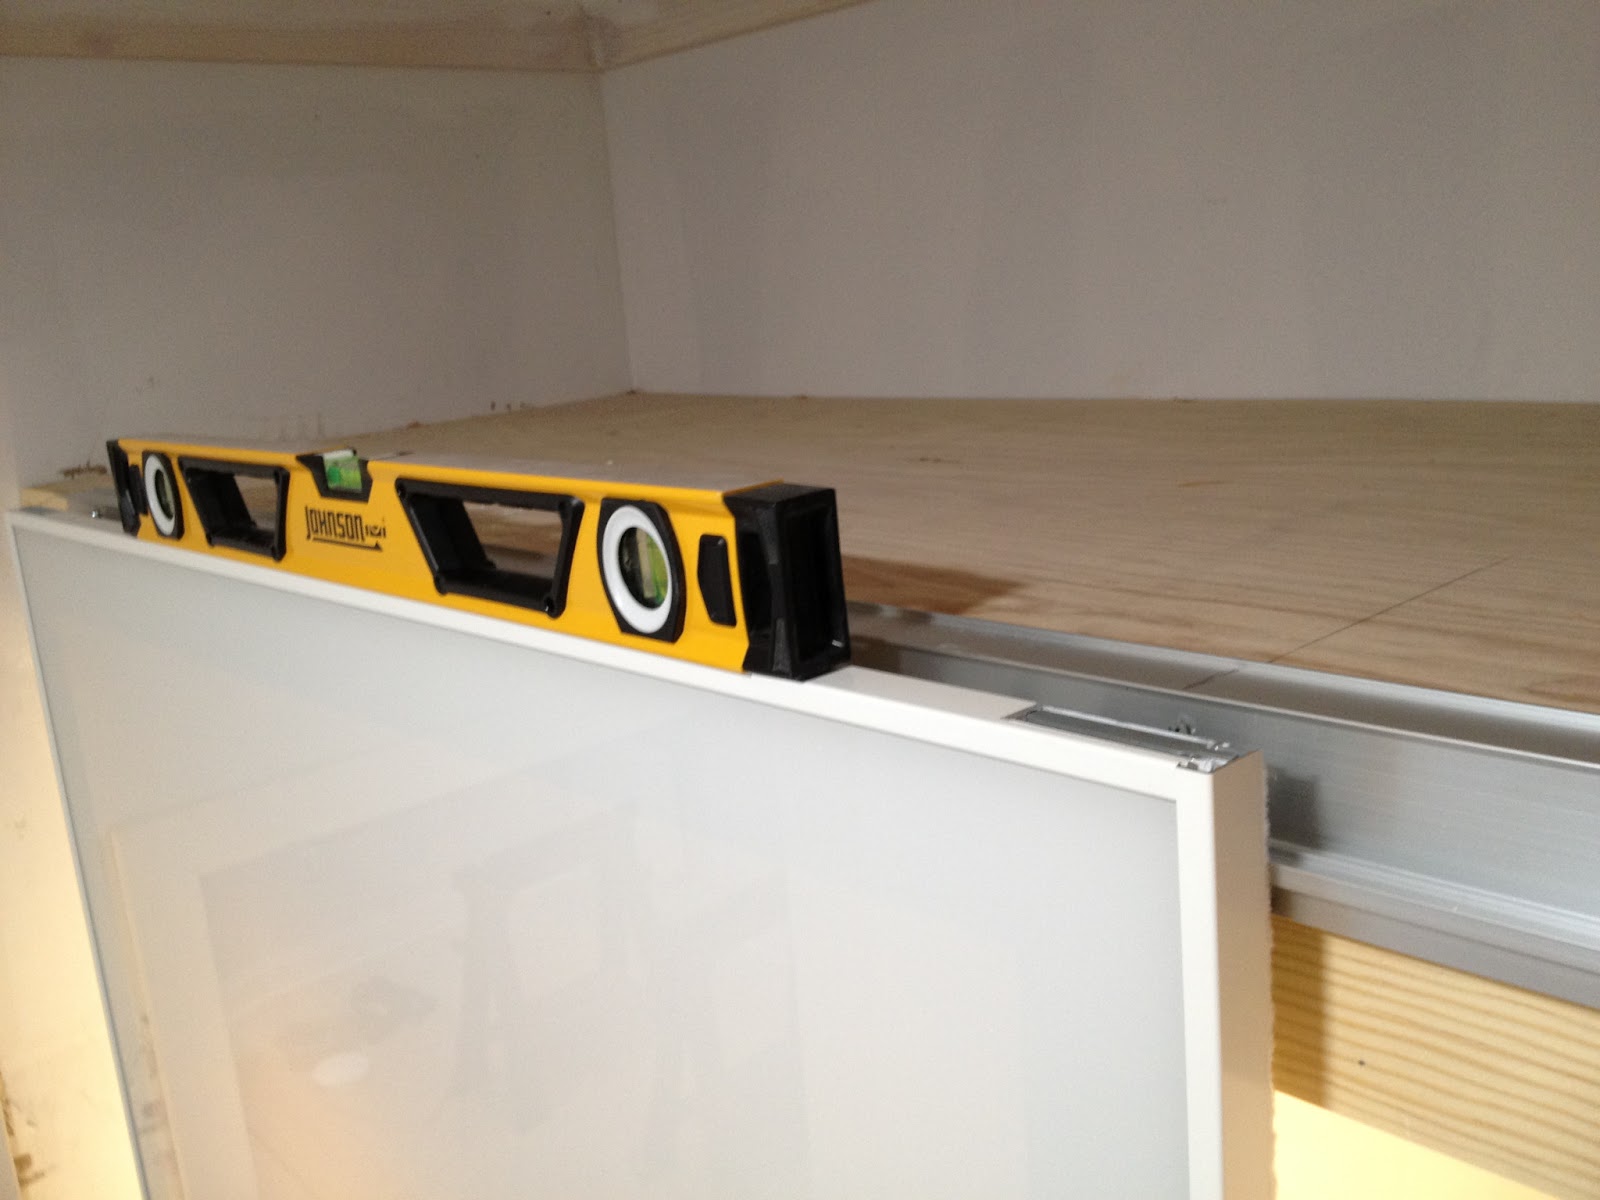
| Level... |
 |
| ..and plumb. |
 |
| Next step was to figure out the side pieces to close this gap. |
 |
| A piece of 1X6" primed pine was ripped down to 5 1/2" and 5 1/4", as each side was slightly different. The bottom track is centered, but the walls are not 100% true to each-other. |
 |
| Here is the look on the left. |
 |
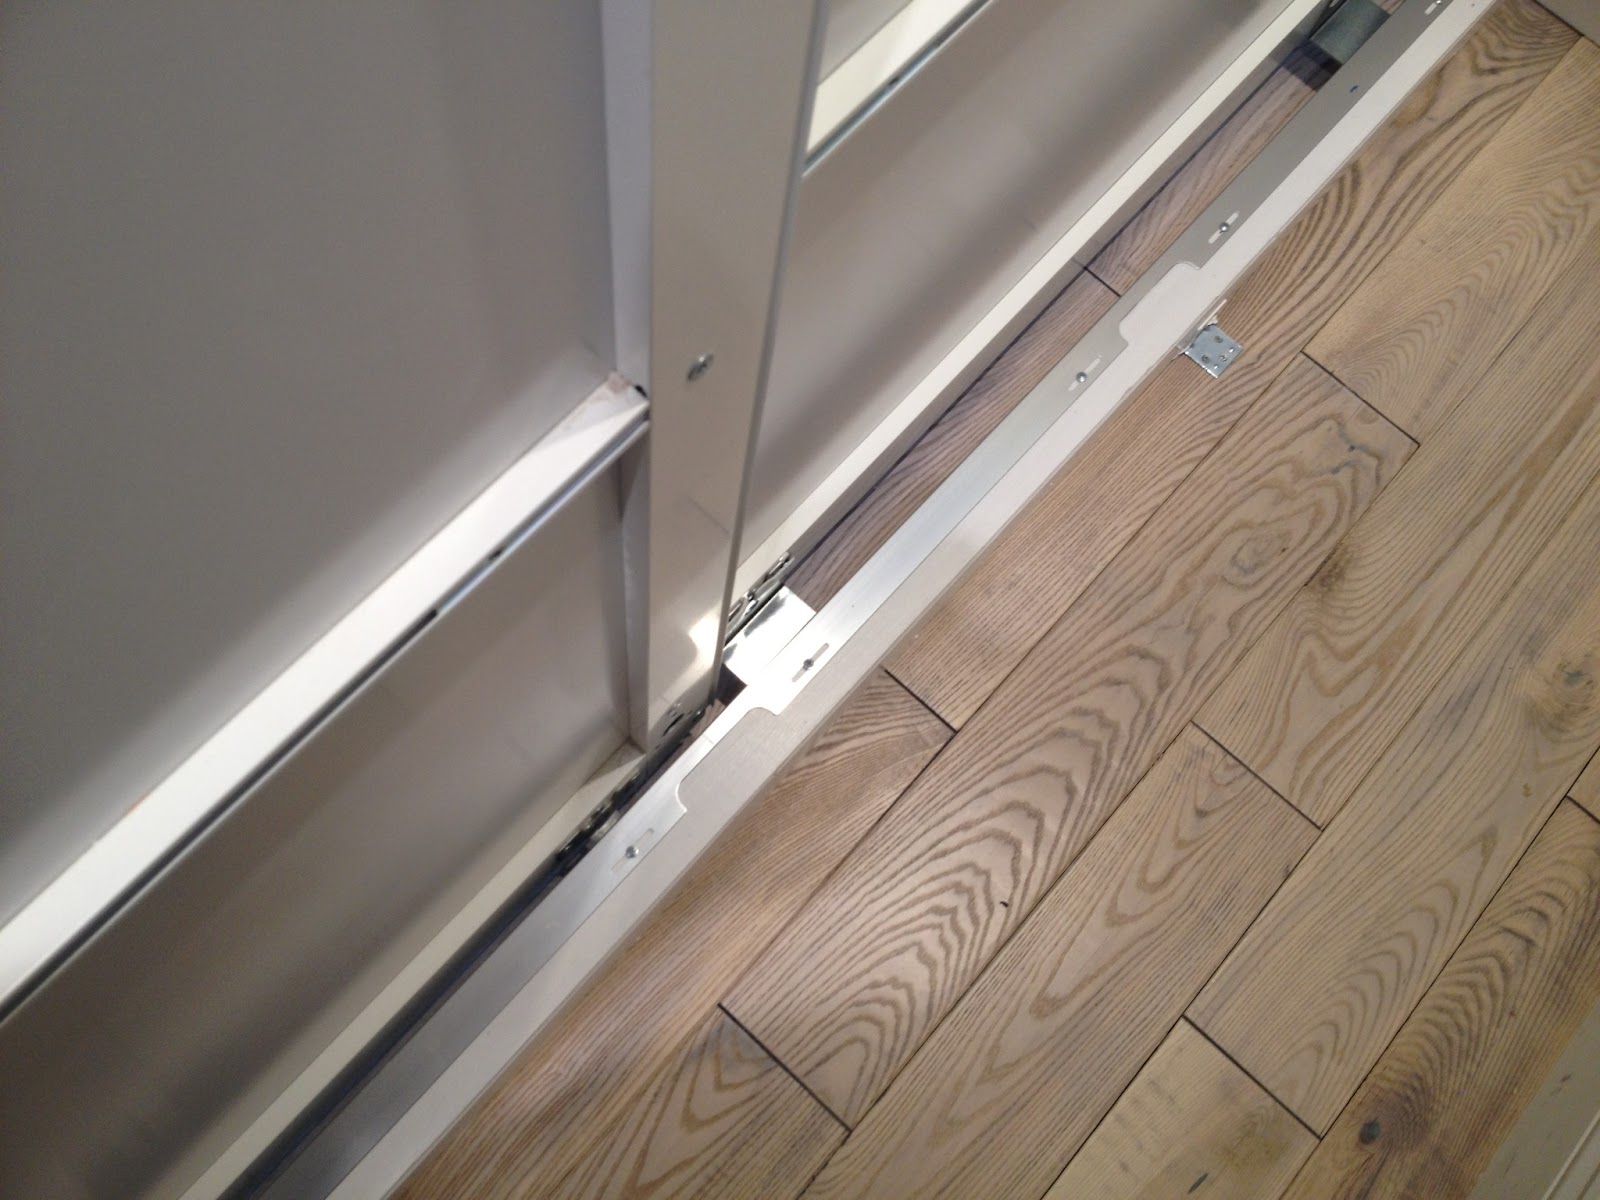
| I notched out the rail on both sides, as the bottom track is slightly shorter than the top track. |
 |
| I "sistered" another piece of 1X6" pine to the inside, leaving a 1/4" reveal. |
 |
| Gluing and nailing. |
 |
| I added three hurricane ties to each side, securing them to the wall. |
 |
| I used drywall anchors (Triple Grip # 8 1-1/4 Anchors with Screws from HD) and more of those handy drywall screws... I particularly like the TripleGrip brand, as the anchors come with a drill bit--no guessing on size, and the bit goes through masonry as well. Do not over tighten the anchors, lest you wind up with a spinning anchor, which has lost its grip! |
 |
| We removed the bottom track to paint--again wanting to keep trying to keep the closet looking as polished as possible. Note the lag hole. I cut two round "pegs" from the pine lattice to fill the two center ones, but not the ends. If I was to do it again, I'd fill the end ones as well, before attaching the sides... |
 |
| Finished closet. This took us about 8-10 solid days of work (60-80 hours) to complete, mostly as we were figuring it out as we went along. It cost us about $600 all up--$499 (plus tax) for the doors, and about $50 for the other parts. It was spread out over nearly three months, as we installed the floor, baseboards, and door trim in the middle of its creation. If it was done again I suspect it could be completed in a weekend or two at the most. |
 |
| Lights nicely from the inside. |
 |
| Bottom track completed. |
 |
| Baseboard installed--cutout to fit around the curb. |
 |
| The lights are LED Surface Mount Downlight Powered by JuiceWorksfrom SeaGull Lighting Unfortunately, they seem to be discontinued. |
 |
| We both liked the white, and the subtle blossom detail was not overpowering. I also like the fact that they are well constructed, heavy gauge aluminum with a durable epoxy/polyester powder coat, and that the glass was tempered safety painted with a glass-specific enamel. |
|


What did u do with the old drawers and doors from the old built in?
ReplyDeleteThis is a great write up. Thank you so much. I've been wanting to do this to two of my closets and I feel much more confident now with your detailed instructions.
ReplyDeleteThe doors look great!
Well done! very useful idea
ReplyDelete@Rustin-- I am storing them in the basement for the time being. I have ideas of a workshop/"man-cave" outfitted with some sort of wall storage--maybe they will work into that...?
ReplyDelete@TK-- You are most welcome. I wanted to try and describe what was done/figured out so someone else might have leg up on the process. ;]
@Yana-- Thanks, glad you liked it!
And thanks kindly to everyone who took the time to comment. ;]
I just picked up the PAX Tonnes at Wacky Wednesday here in Toronto today for $99 reduced from $450 and am going to build a wardrobe very similar to yours.
ReplyDeleteHow did your project turn out?
DeleteI'm doing a similar project. Can you confirm the dimension between top of top rail and top of bottom rail? Thanks
ReplyDelete